Some have made makeup an art form in its own right. I'm far from mastering the mysteries of makeup, but I'm still sharing some basics that have helped me avoid a lot of trouble.
I have often seen people, and not only men, start their makeup with foundation. In my opinion, this is a mistake for two reasons. First of all, if you start directly with the foundation, you will have to use it to smooth your skin, which will use up product, create layers in places which risk giving a "caked" effect which will get worse over time (with time, that is to say with your age but also with time during the day!). The second reason is that your skin deserves a little attention and protection.
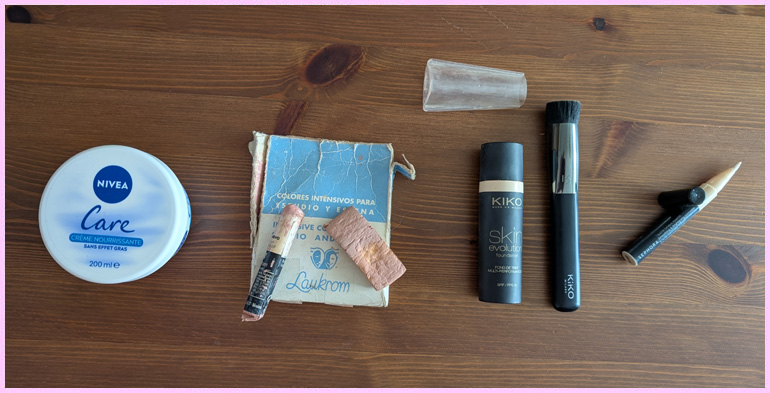
I always start my makeup with a quick cleanse and moisturizer (the "basic" Nivea cream that's everywhere for me). Applying a reasonable amount of moisturizer to damp skin helps seal in moisture and keeps skin hydrated throughout the day. Laissez-la pénétrer complètement avant d'appliquer le maquillage, trop de crème hydratante peut faire glisser le maquillage ou lui donner une apparence pâteuse.
Nowadays, there are products called "primers" which are a kind of "undercoat" that improve the setting of foundation, but also the hold of blush, lipstick, concealer or eyeshadow! I don't have an opinion on these products since I've never had the opportunity to test them.
When it comes to makeup, a man's biggest concern with women is facial hair... Even if you're clean-shaven, if you're not blond, don't expect to skip this step! On this subject, if you have a "troublesome" beard, you can improve things by applying a towel wet with hot water (hot but not scalding!) to your face and keeping it there for a minute (you can add hot water after a minute and take another minute). This will soften the hairs, which will cut better right after.
A lot of advice tells crossdressers to cover the shadow of the beard with a heavy concealer. I've never found this method to be effective! It gives a heavy, cakey look that can draw even more attention to the area you were trying to hide.
I use the Laukrom brand (which became Menside) and I am satisfied with it. Friends use Kryolan, which is often found in costume stores, and are just as satisfied with it.
What is the purpose of foundation? To make your complexion more even, by erasing imperfections and skin redness. The foundation color should be identical or almost identical to your skin tone. If your skin tends towards orange, opt for an orange foundation. If your skin tends towards pink, choose a slightly pink foundation... If your skin is fair, choose a light foundation and not a medium one. Likewise, if you have a dark complexion, do not choose a foundation that is light or lighter than your skin tone!
Never spread foundation with your fingers! Use a specially designed brush or small, teardrop-shaped sponges to reach narrow areas.
Start by putting a little (A LITTLE!) of foundation on the back of one hand, then use the brush to take some of the product and apply it with a few touches to your forehead, cheeks and chin. Always stretch from the center outwards and downwards for a "lifting" effect. Proceed with small, dynamic movements. You are finished applying when you no longer see any traces. Be careful not to apply too much, this is the main mistake at the beginning!
Concealer is one of the essential makeup tools. It reduces unsightly signs of fatigue under the eyes and brightens the look. Choose a concealer color one shade lighter than your natural skin tone. A shade that's too dark can accentuate the appearance of dark circles, while a shade that's too light may not cover them.
There's a long-standing debate about whether to apply concealer before or after foundation. The majority prefers to apply it after, and for once, I agree with the majority. Concealer is applied in small dabs with your finger. It's much better to add more than to overdo it the first time!
Once you have the sequence of steps down, there is only one way to progress, you have to apply makeup. Take the time to try things and different products to find what suits you perfectly. There are tons of videos giving a lot of advice and showing the right steps. Even if we can obviously never believe that the product offered is the best since many of these people are sponsored, the fact remains that the method used is clearly visible and you can test it at home with your products.
Is there a real difference between an $40 Chanel nail polish and a $4 entry-level one? Yes! BUT that said, you have to see what you mean by that! I have a Chanel “Rouge Noir” nail polish that I love. I don’t know how old it is, more than 15 years old for sure, and it’s as perfect as the first day, whereas I’ve had some that were to be thrown away after a year (or even after noticing on first use that they didn’t cover at all or that you’d have to apply 5 coats!). At the lower end, there’s everything of course, you have to test. Also be careful not to put just anything on your skin! But mainstream brands generally offer good value for money. Personally, I buy a lot from Kiko, not because I find them much better than the competition, but simply because I have Italian origins...
